Get Ready for Valentine's Day With This On-Trend Beauty Routine
With February fourteenth right around the corner, the hunt for the perfect Valentine’s Day look is on. Whether you're preparing a romantic evening for two or planning on popping bubbly with the girls, this quick and easy beauty routine will create a glowing, lovestruck look.

Step 1: Sparkly Red Lip
We know, we know—a red lip for Valentine’s Day is far from groundbreaking, but there’s one tiny ingredient that’ll take that crimson color from been-there-done-that territory to completely in-the-moment, and that's glitter. Like ruby slippers for your face, a sparkly red lip makes the ultimate statement. And what better time to draw the attention to your mouth than V-Day? The first step is to choose a deep red base color, apply generously, and follow with a clear gloss. Next, dab fine red makeup glitter onto your lips with a brush, starting in the center and moving outwards. Clean up the edges with masking tape (to grab any glitter gone astray).
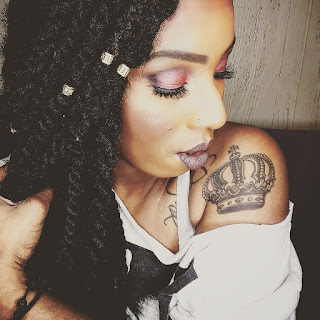
Step 2: A Matte Eye
To balance the intense shimmer of your ruby red glitter lip, a matte eye is a must. But just because it doesn’t contain any sparkle doesn’t mean that your eye makeup has to be subtle. This year is all about smudgy, imperfect eyes—liner is either degraded on the bottom lash line or lined only in the center of the eyes for an unfinished look. To create the purposefully lived-in feel, use black kohl liner in the waterline and along the last line, then mess it up with q-tips. Leave lids bare or dab on a light orange eye gloss for a hint of soft color.
Step 3: Not-So-Basic Curls
If tousled, touchable curls come to mind when you think of romantic hairstyles, we’re one hundred percent with you. To get those short, soft curls, start with a thin flat iron (around one inch) and wrap hair away from the face, working in small sections. After curling, gently tug on the curl to stretch and loosen the shape just a bit. Repeat for the rest of your hair, alternating the direction you wrap each piece. Once you’ve finished the bottom half of your hair, twist both sides back and pull random sections into a bun, securing with bobby pins where needed. Leave a few stray curls at the front to frame your face. For another take on wavy hair that’s anything but basic, opt for a half-up top knot style that leaves your curls free at the bottom.

Step 1: Sparkly Red Lip
We know, we know—a red lip for Valentine’s Day is far from groundbreaking, but there’s one tiny ingredient that’ll take that crimson color from been-there-done-that territory to completely in-the-moment, and that's glitter. Like ruby slippers for your face, a sparkly red lip makes the ultimate statement. And what better time to draw the attention to your mouth than V-Day? The first step is to choose a deep red base color, apply generously, and follow with a clear gloss. Next, dab fine red makeup glitter onto your lips with a brush, starting in the center and moving outwards. Clean up the edges with masking tape (to grab any glitter gone astray).
Step 2: A Matte Eye
To balance the intense shimmer of your ruby red glitter lip, a matte eye is a must. But just because it doesn’t contain any sparkle doesn’t mean that your eye makeup has to be subtle. This year is all about smudgy, imperfect eyes—liner is either degraded on the bottom lash line or lined only in the center of the eyes for an unfinished look. To create the purposefully lived-in feel, use black kohl liner in the waterline and along the last line, then mess it up with q-tips. Leave lids bare or dab on a light orange eye gloss for a hint of soft color.
Step 3: Not-So-Basic Curls
If tousled, touchable curls come to mind when you think of romantic hairstyles, we’re one hundred percent with you. To get those short, soft curls, start with a thin flat iron (around one inch) and wrap hair away from the face, working in small sections. After curling, gently tug on the curl to stretch and loosen the shape just a bit. Repeat for the rest of your hair, alternating the direction you wrap each piece. Once you’ve finished the bottom half of your hair, twist both sides back and pull random sections into a bun, securing with bobby pins where needed. Leave a few stray curls at the front to frame your face. For another take on wavy hair that’s anything but basic, opt for a half-up top knot style that leaves your curls free at the bottom.

Comments
Post a Comment